You must be root to generate a key.
First, use the cd command to change to the /etc/httpd/conf/ directory. Remove the fake key and certificate that were generated during the installation with the following commands:
rm ssl.key/server.key
        rm ssl.crt/server.crt
The crypto-utils package contains the genkey utility which you can use to generate keys as the name implies. To create your own private key, please ensure the crypto-utils package is installed. You can view more options by typing man genkey in your terminal. Assuming you wish to generate keys for www.example.com using the genkey utility, type in the following command in your terminal:
genkey www.example.com
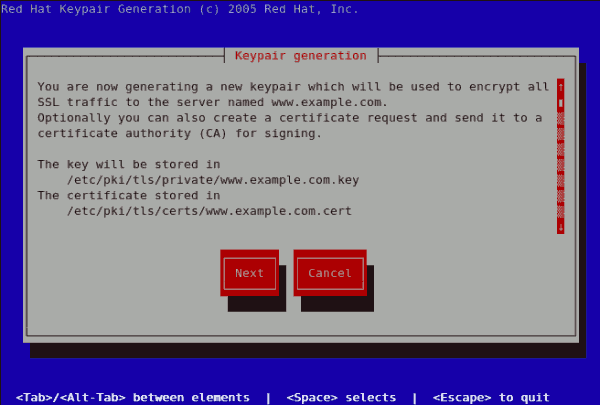
Please note that the make based process is no longer shipped with RHEL 5. This will start the genkey graphical user interface. The figure below illustrates the first screen. To navigate, use the keyboard arrow and tab keys. This windows indicates where your key will be stored and prompts you to proceed or cancel the operation. To proceed to the next step, select Next and press the Return (Enter) key.
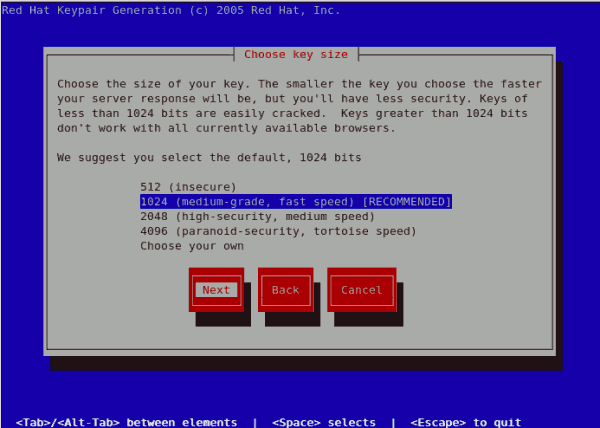
The next screen prompts you to choose the size of your key. As indicated, the smaller the size of your key, the faster will the response from your server be and the lesser your level of security. On selecting your preferred, key size using the arrow keys, select Next to proceed to the next step. The figure below illustrates the key size selection screen.
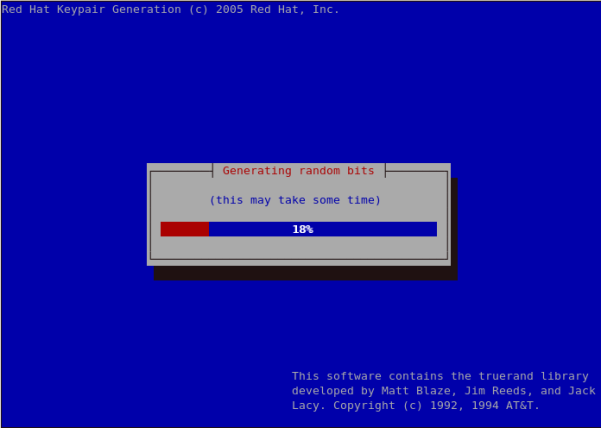
Selecting the next step will initiate the random bits generation process which may take some time depending on the size of your selected key. The larger the size of your key, the longer it will take to generate it.
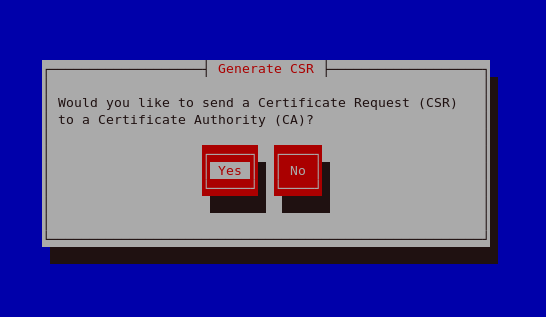
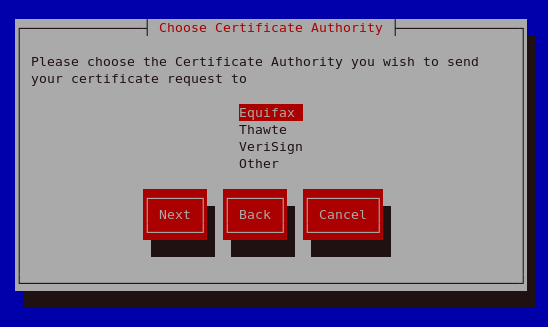
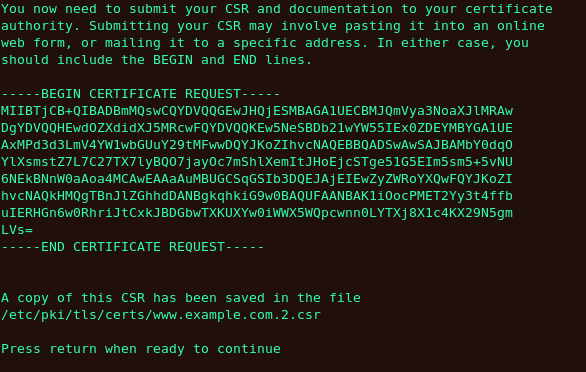
On generating your key, you will be prompted to send a Certificate Request (CSR) to a Certificate Authority (CA).
On Selecting your preferred option, select Next to proceed to the next step. The next screen allows you to enter the details of your certificate.
If you prefer to generate a self signed cert key pair, you should not generate a CSR. To do this, select
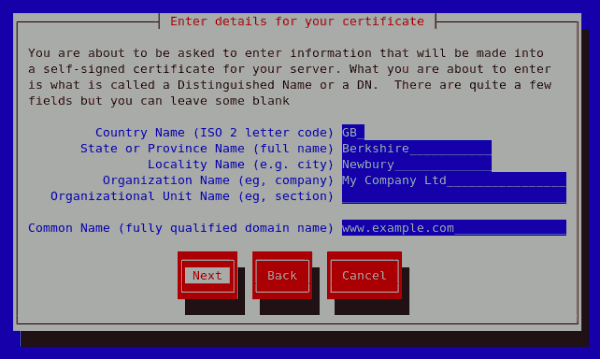
No as your preferred option in the Generate CSR screen. This will display the figure below from which you can enter your certificate details. Entering your certificate details and pressing the return key will display the
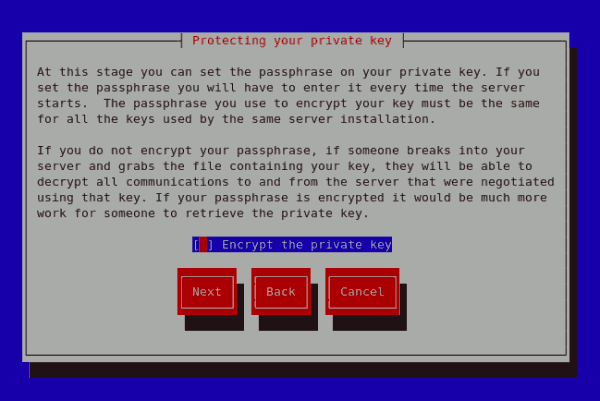
Figure 11.19, “Protecting your private key” from which you can choose to encrypt your private key or not.
On entering the details of your certificate, select Next to proceed. The figure below illustrates an example of a the next screen displayed after completing the details for a certificate to be sent to Equifax. Please note that if you are generating a self signed key, for your server, this screen is not displayed.
Pressing the return key, will display the next screen from which you can enable or disable the encryption of the private key. Use the spacebar to enable or disable this. When enabled, a [*] character will be displayed. On selecting your preferred option, select Next to proceed to the next step.
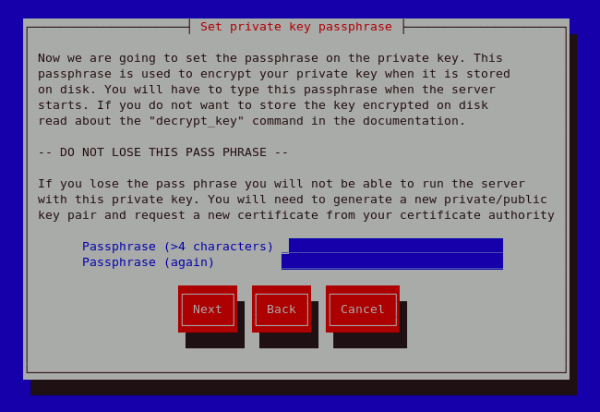
The next screen allows you to set your key passphase. Please do not lose this pass phase as you will not be able to run the server without it. You will need to regenerate a new private or public key pair and request a new certificate from your CA as indicated. For security, the passphase is not displayed as you type. On typing your preferred passphase, select Next to go back to your terminal.
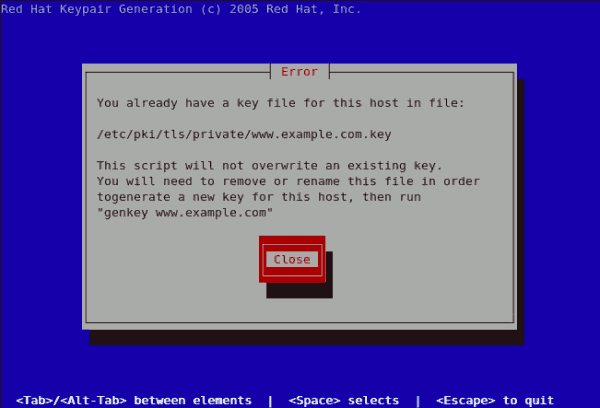
If you attempt to run genkey makeca on a server that has an existing key pair, an error message will be displayed as illustrated below. You need to delete your existing key file as indicated to generate a new key pair.